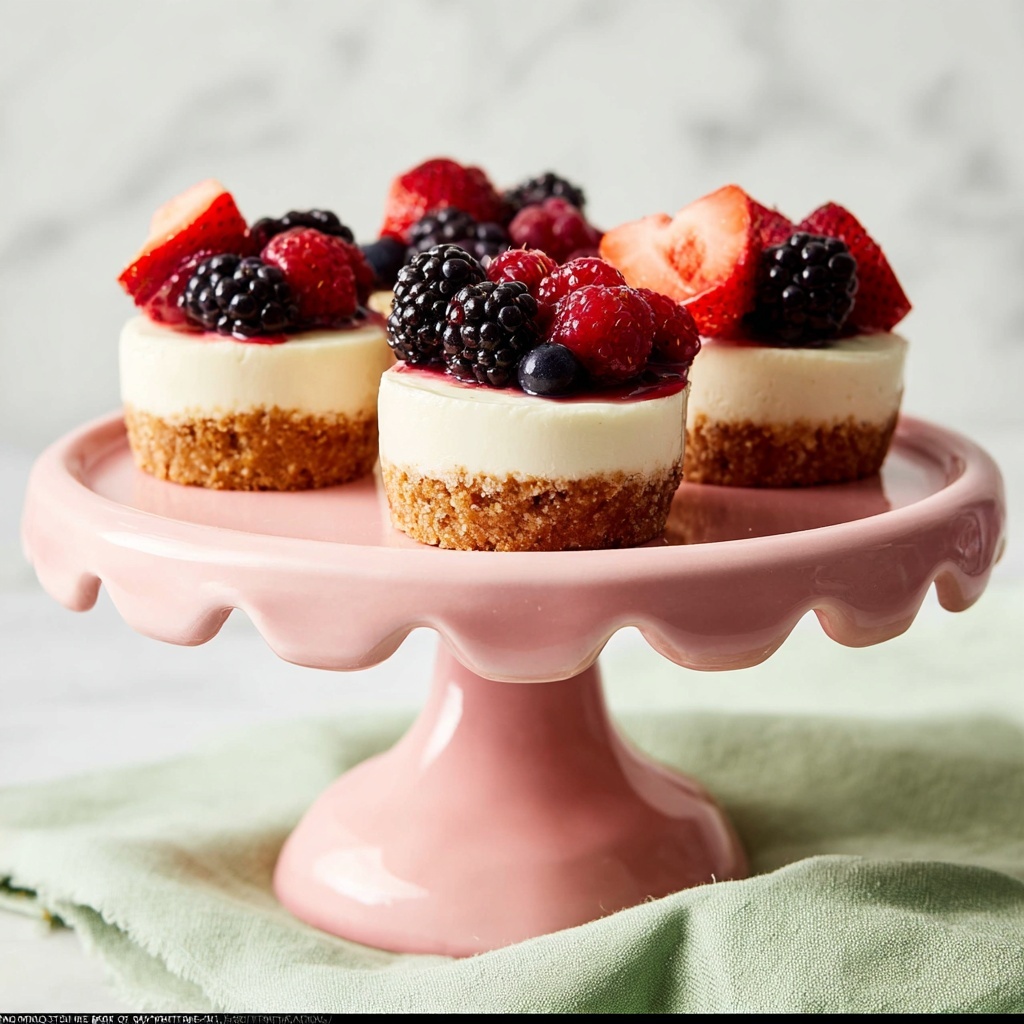
There is something truly magical about a dessert that comes together quickly, tastes indulgently creamy, and feels like a special treat—this Mini No-Bake Cheesecakes Recipe hits all those marks beautifully. Imagine biting into a delicate graham cracker crust, perfectly crumbly yet sturdy, topped with a fluffy, tangy-sweet cheesecake filling that melts in your mouth. These mini delights are not only crowd-pleasers but also wonderfully easy to make, which means you can whip up a batch anytime you want to impress friends or simply indulge your sweet tooth without breaking a sweat.
Ingredients You’ll Need
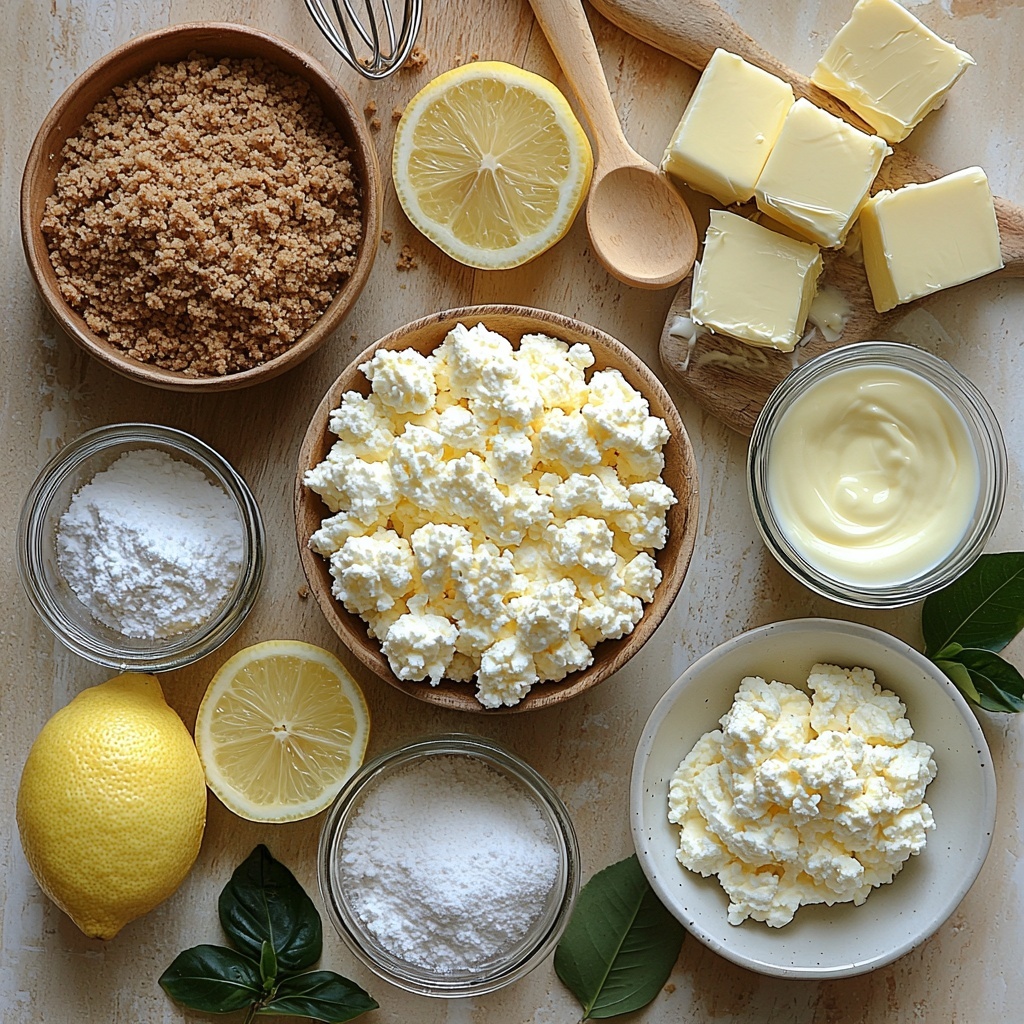
This Mini No-Bake Cheesecakes Recipe keeps things delightfully simple with readily available ingredients, each playing a vital role in creating the perfect balance of texture and flavor. From the buttery crust to the light and airy filling, these components come together like magic.
- Graham cracker crumbs: The classic base that provides a slightly sweet, crunchy foundation for the cheesecakes.
- Brown sugar: Adds a subtle molasses note and moisture that complements the buttery crust perfectly.
- Unsalted butter: Melted to bind the crust ingredients, ensuring a firm but tender base.
- Cold heavy cream or heavy whipping cream: Whipped to stiff peaks to create that luscious, airy cheesecake texture.
- Full-fat cream cheese: The star of the filling, softened for easy blending and rich creaminess.
- Granulated sugar: Sweetens the filling and balances the tang from other ingredients.
- Sour cream or plain yogurt: Adds a hint of tang and smoothness to the cheesecake filling.
- Fresh lemon juice: Brightens the flavor and cuts through the richness beautifully.
- Pure vanilla extract: Introduces warm, comforting notes that elevate the overall taste.
- Optional toppings: Customize your mini cheesecakes with fresh fruit, chocolate shavings, or fruit compotes for an extra special touch.
How to Make Mini No-Bake Cheesecakes Recipe
Step 1: Prepare Your Pans
Start by lining two standard 12-count muffin pans with cupcake liners. This sets the stage for perfectly sized mini cheesecakes and helps with easy removal once chilled. Having your refrigerator space ready for these pans is a smart move since cooling is essential later on.
Step 2: Make the Crust
Pulse your graham crackers into fine crumbs if you haven’t already done so, then mix them with brown sugar and melted butter until combined. The mixture should resemble wet sand, which means it will pack nicely in the liners. Spoon about one and a half tablespoons into each liner and firmly press down to create a sturdy base that will hold the creamy filling without taking over.
Step 3: Optional Crust Baking
While this is a no-bake recipe overall, giving the crust a quick 5-minute bake at 350°F adds a lovely extra crunch and sturdiness. It helps prevent crumbling when you’re eating these mini treats. If you prefer, you can skip this step—just expect a bit more crumble but still delicious results. Remember to let the crusts cool completely before moving on.
Step 4: Whip the Cream and Make Filling
Using either a hand or stand mixer fitted with a whisk attachment, whip your cold heavy cream until stiff peaks form—this is the secret to that airy, light texture everyone loves. Next, beat your cream cheese and granulated sugar until smooth, then add sour cream, lemon juice, and vanilla extract, beating until completely combined without lumps. Gently fold the whipped cream into this mixture to keep all that airy goodness intact. Taking your time here results in the creamiest, most delicate cheesecake filling you can imagine.
Step 5: Fill the Cheesecakes
Transfer the filling onto the crusts either by spoon or, for a neater touch, pipe it using a piping bag fitted with a round or star tip. Each mini cheesecake gets about two tablespoons of filling. Smooth the tops with the back of a spoon for that flawless finish that invites everyone to dig in.
Step 6: Chill Thoroughly
Refrigerate your mini cheesecakes for at least 3 hours, or up to 2 days if covered well. This chilling time allows the filling to set perfectly, so you get that delightfully firm yet creamy bite we all crave from a cheesecake. Trust me, the wait is worth every second!
Step 7: Serve and Enjoy
Your Mini No-Bake Cheesecakes Recipe is now ready to delight your taste buds. Keep them refrigerated until serving to maintain their shape and freshness. They’ll soften and stick to liners a bit if left at room temperature too long, so it’s best to enjoy soon after taking them out of the fridge.
Step 8: Store Leftovers
If you happen to have any leftovers (which might be rare!), cover and refrigerate them properly to enjoy within five days. The flavors may even deepen a bit after sitting, making a perfect make-ahead treat for your future cravings.
How to Serve Mini No-Bake Cheesecakes Recipe
Garnishes
Mini cheesecakes are a perfect canvas for your creativity. Fresh berries like strawberries, blueberries, or raspberries add a pop of color and bright fruity contrast. A drizzle of chocolate or caramel sauce can add a luxurious touch, while a sprinkle of toasted nuts or coconut flakes offers some delightful texture.
Side Dishes
Pair these cheesecakes with light refreshments like herbal teas, sparkling water with a squeeze of citrus, or a glass of sweet dessert wine. They complement the rich, creamy flavor without overwhelming the palate, making your dessert experience feel even more elegant and balanced.
Creative Ways to Present
For a fun party setup, arrange the mini cheesecakes on a decorative platter with edible flowers or fresh mint leaves for extra flair. You can also serve them in mini mason jars or small clear cups for individual portions that look stunning and are easy for guests to grab and enjoy.
Make Ahead and Storage
Storing Leftovers
Leftover mini cheesecakes should be tightly covered with plastic wrap or stored in an airtight container in the refrigerator. They keep well for up to five days, and this brief resting time can even enhance the flavors as they meld together beautifully.
Freezing
If you want to prepare these mini treats well in advance, freezing is a great option. Place them on a baking sheet to freeze individually before transferring to a sealed container or freezer bag. They can last up to one month frozen. When ready to enjoy, thaw overnight in the fridge to keep their creamy texture intact.
Reheating
Since these are no-bake cheesecakes, reheating is not recommended; they are best served chilled. If they’ve been frozen, simply thaw them gently in the fridge. This helps maintain the perfect balance of creamy texture and fresh flavor you expect from this recipe.
FAQs
Can I use low-fat cream cheese for the Mini No-Bake Cheesecakes Recipe?
You can use low-fat cream cheese, but keep in mind that the texture might be less creamy and the flavor a bit less rich. Full-fat cream cheese really makes a difference in achieving that classic cheesecake indulgence.
Do I have to bake the crusts?
Baking the crust is optional but recommended. It adds extra firmness to prevent crumbling and gives a slight toasted flavor. If you skip this step, just be gentle when serving as the crust will be softer and more crumbly.
Can I make this Mini No-Bake Cheesecakes Recipe dairy-free?
While this recipe relies heavily on dairy for its flavor and texture, you could experiment with dairy-free cream cheese and coconut cream. Results can vary, so it’s worth testing small batches first to see how the substitutions work.
How long do these mini cheesecakes last in the fridge?
They stay fresh and delicious for up to five days when properly covered. Beyond that, the texture and flavor might start to decline.
Can I add flavors or mix-ins to the filling?
Absolutely! Feel free to add a few drops of your favorite extract such as almond or lemon, or gently fold in berries or chocolate chips. Just be careful not to deflate the whipped cream too much while mixing.
Final Thoughts
If you love a dessert that is both approachable and irresistibly delicious, this Mini No-Bake Cheesecakes Recipe is going to be your new best friend. Whether it’s a casual weekend treat or a party showstopper, these tiny cheesecakes pack a big flavor punch with minimal effort. Give them a try and watch how quickly they disappear from the platter—trust me, your friends and family will be asking for the recipe again and again!
Print
Mini No-Bake Cheesecakes Recipe
- Prep Time: 25 minutes
- Cook Time: 5 minutes
- Total Time: 30 minutes plus chilling time of at least 3 hours
- Yield: 24 mini cheesecakes
- Category: Dessert
- Method: No-Cook
- Cuisine: American
Description
These Mini No-Bake Cheesecakes are delightful bite-sized treats perfect for any occasion. With a buttery graham cracker crust and a creamy, tangy cheesecake filling, they require minimal effort and no oven baking for the filling. Ready in under 30 minutes plus chilling time, they’re perfect for easy entertaining or a sweet snack.
Ingredients
Crust
- 2 cups (240g) graham cracker crumbs (about 16 full sheet graham crackers)
- 1/3 cup (67g) packed light or dark brown sugar
- 1/2 cup (8 Tbsp; 113g) unsalted butter, melted
Filling
- 1 cup (240ml) cold heavy cream or heavy whipping cream
- 16 ounces (452g) full-fat brick cream cheese, softened to room temperature
- 1/3 cup (67g) granulated sugar
- 2 Tablespoons (30g) sour cream or plain yogurt, at room temperature
- 1 teaspoon fresh lemon juice
- 1/2 teaspoon pure vanilla extract
Optional Toppings
- Your desired toppings such as fresh fruit, fruit compote, chocolate shavings, caramel sauce, or whipped cream
Instructions
- Prepare pans: Line two standard 12-count muffin pans with cupcake liners. Ensure you have sufficient refrigerator space for both pans in the chilling step.
- Make crust: If needed, pulse graham crackers to fine crumbs in a food processor. In a medium bowl, combine graham cracker crumbs, brown sugar, and melted butter until mixture resembles wet sand. Spoon about 1 and 1/2 tablespoons into each liner, pressing firmly with the back of a spoon to form compact crusts.
- (Optional) Bake crusts: To achieve sturdier crusts, bake at 350°F (177°C) for 5 minutes. Allow crusts to cool for 10 minutes before adding filling. This step is optional; skipping it results in a slightly crumblier crust.
- Prepare filling: Whip cold heavy cream on medium-high speed using a hand or stand mixer fitted with a whisk attachment until stiff peaks form (approx. 3 minutes) and set aside. In another bowl, beat softened cream cheese and granulated sugar on medium speed until smooth and creamy. Add sour cream, lemon juice, and vanilla extract, then beat on medium-high speed for about 1 minute until fully combined with no lumps. Gently fold the whipped cream into the cream cheese mixture using a spatula to maintain airiness.
- Assemble cheesecakes: Spoon or pipe about 2 tablespoons of filling over each crust. Using a piping bag with a large star or round tip gives a neat finish; alternatively, use a zipped-top plastic bag with a corner snipped. Smooth tops with the back of a spoon if desired.
- Chill cheesecakes: Refrigerate assembled mini cheesecakes in the pans for at least 3 hours or up to 2 days. Cover with aluminum foil or plastic wrap if chilling longer than 3 hours.
- Serve: Keep refrigerated until serving. Add optional toppings before serving. Note that cheesecakes may soften and stick to liners if left at room temperature for 30–60 minutes.
- Storage: Store leftovers covered in the refrigerator for up to 5 days.
Notes
- You can skip baking the crust for a no-bake version, but the crust will be less firm.
- Use a piping bag for an easier and cleaner filling application.
- Customize toppings with fresh fruits, chocolate, or sauces to suit your preference.
- Ensure cream cheese and sour cream/yogurt are at room temperature for smooth filling.
- Keep cheesecakes refrigerated to maintain texture and prevent them from sticking to liners.

