
If you have a soft spot for everything rich, creamy, and packed with that unforgettable caramelized spice flavor, you are definitely going to adore this Biscoff Cookie Butter Pudding Jars Recipe. Imagine layers of velvety pudding infused with luscious biscoff cookie butter, sitting atop a crunchy biscoff cookie base, all served in the cutest little jars. It’s the perfect dessert that brings a cozy, indulgent vibe and can be made ahead for any occasion. Once you try these pudding jars, they’ll become your go-to treat to impress family and friends with minimal fuss.
Ingredients You’ll Need
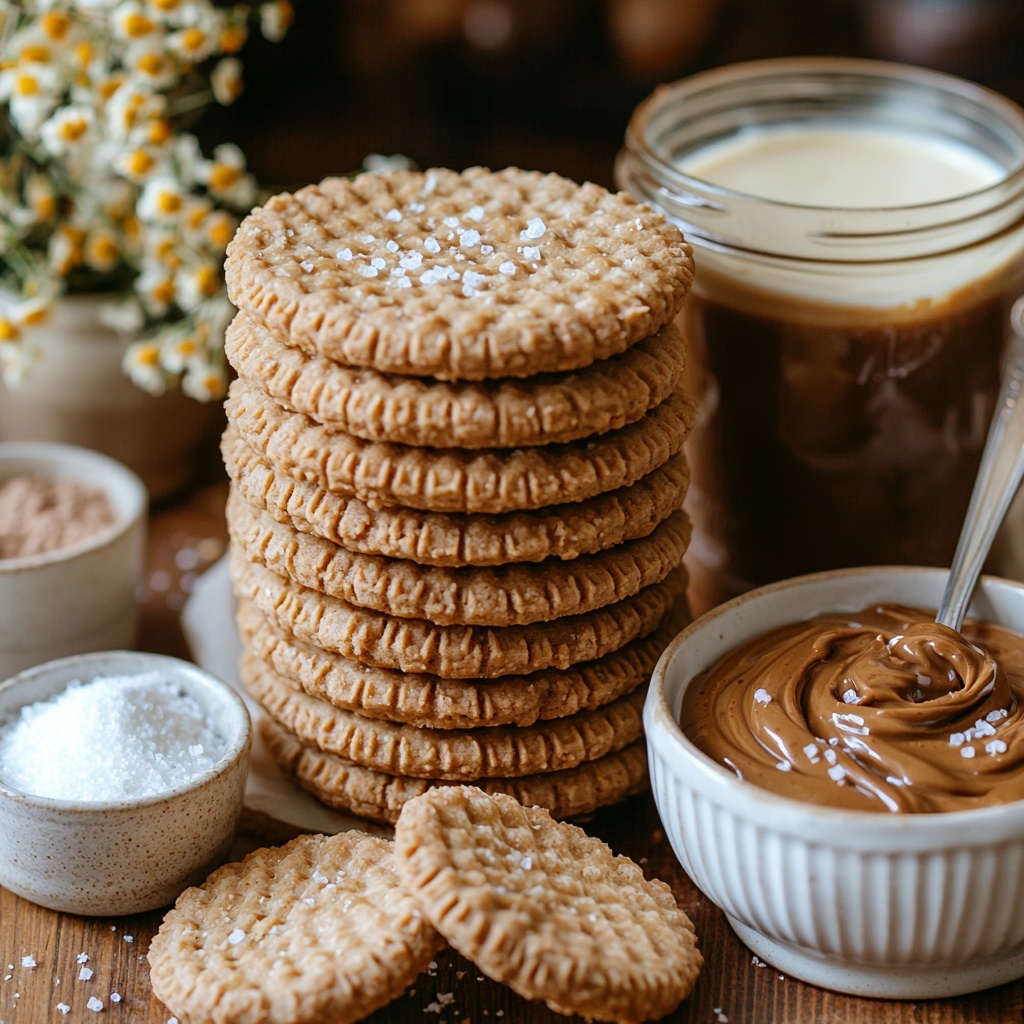
This recipe shines because it uses just a handful of simple, easy-to-find ingredients that each play a vital role in creating the perfect balance of texture and flavor. From the biscoff cookies that form a buttery crust to the silky pudding made rich with cream and cookie butter, every component works in harmony to deliver a dessert that feels both nostalgic and luxurious.
- Biscoff cookies (11): Ground into crumbs, they give a deliciously spicy, crunchy base that’s essential for texture contrast.
- Butter (2 tablespoons, melted and cooled): Helps bind the cookie crumbs together for a compact, buttery crust.
- Cornstarch (3 tablespoons): Acts as the thickening agent, making the pudding perfectly creamy without being too heavy.
- Whole milk (500 ml + 3 tablespoons): The liquid base for the pudding, providing creaminess and enhancing the biscoff flavor.
- Granulated white sugar (3-4 tablespoons): Adds the right amount of sweetness to balance the warmth of the cookie butter.
- Biscoff cookie butter (½ cup + 2 tablespoons, slightly melted): The star ingredient, infusing the pudding with that iconic caramelized flavor.
- Pinch of salt: Elevates all the sweetness and brings out the depth of flavors.
- Heavy cream (1 cup): Whipped to lighten the pudding, creating a dreamy, airy texture.
- Melted chocolate (for drizzling): Adds an extra layer of decadence when garnished on top.
How to Make Biscoff Cookie Butter Pudding Jars Recipe
Step 1: Prepare the Cookie Base
Start by pulsing the biscoff cookies into fine crumbs using a food processor. Add the melted butter and mix until the crumbs hold together like sandcastles. Spoon about 2 teaspoons of the mixture into each jar (or less if using smaller containers) and press firmly with a muddler or the back of a spoon to create a compact crust. Pop those jars in the fridge while you move on to the pudding filling. This chilled base is crucial—it ensures the pudding sits atop a crispy layer, delivering delightful texture contrast with every bite.
Step 2: Make the Cornstarch Slurry
In a small bowl, whisk together the cornstarch with 3 tablespoons of warm whole milk until smooth. Setting this aside allows the starch to dissolve completely so it can work its magic thickening the pudding perfectly later on.
Step 3: Warm the Milk and Sugar
Pour the remaining 500 ml of whole milk into a pan and gently heat over medium heat. Once it warms up, stir in the sugar, making sure to continuously stir to prevent the milk from sticking or burning. Slowly bringing the milk to just under boiling helps activate the pudding’s thickening ingredients without scorching the delicate biscoff flavor.
Step 4: Add Biscoff Cookie Butter and Salt
Remove the pan from heat. Melt the biscoff cookie butter briefly until just runny, then whisk it into the hot milk along with a pinch of salt. This is the moment when all those warm spiced notes come alive, blending smoothly into the creamy base, promising a luscious pudding with layers of flavor in every spoonful.
Step 5: Incorporate the Cornstarch Mixture
Quickly give your cornstarch slurry a stir (since it can settle when resting) and pour it into the milk mixture. Return the pan to medium-low heat and whisk continuously. You’ll notice the pudding start to thicken within moments—this process only takes about one to one and a half minutes. Remember, the goal here is a silky, not rubbery, pudding. Once thickened, remove from heat and let cool for about 20 minutes.
Step 6: Strain for Smoothness (Optional)
If you’re aiming for an ultra-smooth pudding, strain the mixture through a fine sieve to remove any lumps. This step isn’t mandatory but definitely a pro tip to elevate the texture and give a flawless finish that will impress every palate.
Step 7: Whip and Fold in the Cream
Whip the heavy cream until soft peaks form—be careful not to overdo it, or you risk separating the cream. Gently fold the whipped cream into the pudding mixture in two to three batches, keeping as much air as possible. This folding technique is what transforms the pudding into a light, cloudlike treat without losing the richness.
Step 8: Assemble in Jars and Chill
Pipe or spoon the pudding carefully over the chilled biscuit base in each jar. Refrigerate for at least one hour to set. This resting time allows the flavors to meld while the pudding firms up, giving you that perfect spoonful that holds together yet melts in your mouth.
Step 9: Drizzle and Garnish
Warm a little more biscoff cookie butter and drizzle generously over each jar before chilling again for another hour. Finally, add a drizzle of melted chocolate and a sprinkle of biscoff cookie crumbs on top for contrast and a hint of elegance. This finishing touch makes the Biscoff Cookie Butter Pudding Jars Recipe truly irresistible and picture-perfect.
How to Serve Biscoff Cookie Butter Pudding Jars Recipe
Garnishes
For the ultimate presentation, drizzle melted chocolate and biscoff cookie crumbs on top just before serving. You can also add a dollop of whipped cream or a sprinkle of crushed nuts for added texture. These simple garnishes elevate the look and create exciting flavor bursts with each bite.
Side Dishes
These pudding jars are such a luscious dessert that they shine on their own, but pairing them with fresh berries or a light citrus salad can refresh the palate beautifully. A cup of strong coffee or spiced chai complements the cookie butter flavors splendidly, rounding out the experience perfectly.
Creative Ways to Present
If you want to wow guests, serve the puddings layered in clear glass jars or small mason jars to show off the colorful layers. You could even experiment with mini spoons or edible flowers as a delicate garnish. This Biscoff Cookie Butter Pudding Jars Recipe is versatile enough to become a centerpiece for cozy nights or fancy dinner parties alike.
Make Ahead and Storage
Storing Leftovers
Leftover pudding jars should be tightly covered and kept refrigerated for up to 3 days. The flavors actually deepen after resting overnight, making it a fantastic make-ahead dessert for busy days when you want to impress without fuss.
Freezing
While not ideal for texture preservation, you can freeze the pudding jars without the whipped cream topping for up to a month. Thaw slowly in the refrigerator before serving and whip fresh cream to fold in afterward to restore that fluffy texture.
Reheating
This pudding is best enjoyed chilled, so reheating is not recommended as it can break the texture and flavor balance. Instead, just remove from the fridge 30 minutes before serving to reach the perfect creamy softness.
FAQs
Can I use low-fat milk for this recipe?
Whole milk is preferred in this Biscoff Cookie Butter Pudding Jars Recipe to ensure the pudding’s richness and smooth texture. Using low-fat milk may result in a thinner consistency and less creamy mouthfeel.
Is it necessary to strain the pudding?
Straining is optional but highly recommended for a silky-smooth pudding without lumps. It’s a simple step that makes a noticeable difference, especially if you want a professional-quality dessert.
Can I substitute the biscoff cookie butter?
You can try other cookie butters or flavored spreads, but keep in mind the unique caramelized spice flavor of biscoff cookie butter is what makes this recipe truly special. Substitutions will change the signature taste.
How long should I chill the pudding before serving?
A minimum of one hour is required to allow the pudding to set, but chilling for several hours or overnight enhances the flavor and texture. Just remember to add the final toppings before serving to keep them fresh.
Can I make smaller individual servings?
Absolutely! This recipe adapts well to 2 to 3-ounce containers for mini puddings, perfect for parties or portion control. Just adjust the biscuit base amount accordingly to keep the layers balanced.
Final Thoughts
This Biscoff Cookie Butter Pudding Jars Recipe is such a joy to make and even more delightful to share. It strikes that perfect blend of cozy comfort and elegant indulgence, all in easy-to-handle jars. Whether you’re treating yourself or impressing guests, this dessert offers a sweet experience you’ll come back to again and again. Go ahead—give it a try, and get ready to fall in love with every luscious spoonful.
Print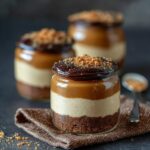
Biscoff Cookie Butter Pudding Jars Recipe
- Prep Time: 20 minutes
- Cook Time: 25 minutes
- Total Time: 45 minutes
- Yield: 12 servings (using 2-3 oz containers)
- Category: Dessert
- Method: Stovetop
- Cuisine: Western
Description
Delight in these creamy Biscoff Pudding Jars, layered with a crunchy Biscoff cookie crust and luscious cookie butter-infused pudding, topped with whipped cream and a drizzle of melted chocolate. Perfectly portioned in individual jars, this dessert combines rich flavors and smooth textures for a decadent treat that’s both easy to prepare and impressively elegant.
Ingredients
Crust
- 11 Biscoff cookies
- 2 tablespoons unsalted butter, melted and cooled
Pudding
- 3 tablespoons cornstarch
- 500 ml whole milk, divided
- 3 tablespoons whole milk, warm (for cornstarch mix)
- 3–4 tablespoons granulated white sugar (38–50 grams; 4 tablespoons recommended)
- ½ cup + 2 tablespoons Biscoff cookie butter (180 grams, slightly melted, plus extra for drizzling)
- Pinch of salt
Topping
- 1 cup heavy cream
- Melted chocolate, for drizzling
- Biscoff cookie crumbs, for garnish
Instructions
- Prepare the Crust: Pulse the Biscoff cookies into crumbs using a food processor. Mix in the melted butter until the mixture resembles coarse crumbs. Spoon about 2 teaspoons of this mixture into each jar (use 1 teaspoon if using 2-3 oz containers) and press down firmly with a muddler or spoon back to compact. Refrigerate the jars while preparing the pudding.
- Mix Cornstarch Slurry: Combine cornstarch with 3 tablespoons of warm whole milk in a small bowl and set aside, stirring to keep smooth.
- Heat Milk and Sugar: In a medium pan over medium heat, warm 500 ml of whole milk. Stir occasionally to prevent sticking. When warm, add granulated sugar, continuing to stir until dissolved.
- Add Cookie Butter and Salt: Remove pan from heat once milk is near a boil. Melt Biscoff cookie butter briefly until runny and whisk it into the hot milk along with a pinch of salt until fully combined.
- Incorporate Cornstarch Mixture: Stir the cornstarch slurry again before adding to the milk. Return the pan to medium-low heat and whisk continuously until the mixture thickens, about 1 to 1½ minutes. Remove from heat but avoid over-thickening. Let cool for 20 minutes.
- Strain the Pudding: For a smoother texture, strain the pudding mixture through a fine mesh sieve. Allow it to cool completely.
- Whip Cream: Beat heavy cream until soft peaks form; avoid over-whipping as cream may separate. Gently fold the whipped cream into the pudding in 2 to 3 batches, preserving the airiness.
- Assemble Pudding Jars: Pipe or spoon the pudding mixture into the prepared jars over the cookie crust. Refrigerate for at least 1 hour to set.
- Top and Chill: Melt additional Biscoff cookie butter and drizzle over each jar. Refrigerate an additional hour. Optionally drizzle melted chocolate on top and garnish with crushed Biscoff cookie crumbs. Chill until ready to serve. Remove from fridge 30 minutes before serving for best texture.
Notes
- Using melted and slightly cooled butter ensures the cookie crust stays compact.
- Straining the pudding is optional but recommended for a silky smooth texture.
- You can adjust the sugar depending on your sweetness preference.
- Use smaller jars (2-3 oz) for bite-sized servings or larger jars for more generous portions.
- Letting the pudding rest in the fridge allows it to set perfectly and develop flavor.
- Be careful not to over-whip the cream to maintain a light, airy pudding texture.
