
“`html
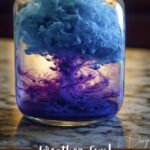
If you’ve ever wished to bring a little piece of the sky right onto your kitchen table, you’re going to adore this playful experiment that doubles as a delightful mini science adventure. The Rain Cloud in a Jar: Create Your Own Weather Fun! Recipe is a fantastic blend of imagination and simplicity, turning everyday items into a mesmerizing visual treat that’s perfect for curious kids and adults alike. This project captures the magic of rain forming and falling, all inside a clear jar, making it as educational as it is enchanting.
Ingredients You’ll Need
What’s amazing about the Rain Cloud in a Jar: Create Your Own Weather Fun! Recipe is just how few ingredients you need—each one straightforward but crucial for this little weather wonder. Every item plays its role beautifully to bring the rain cloud to life right before your eyes.
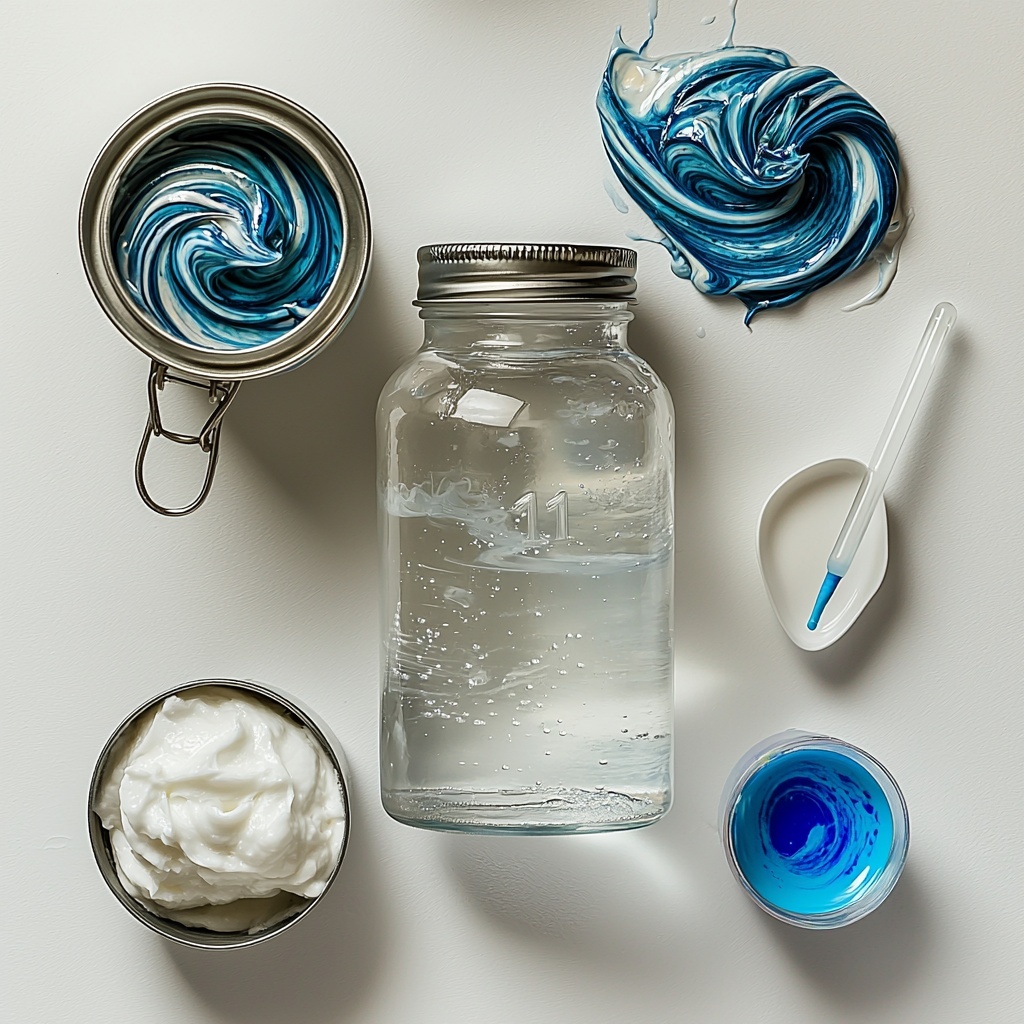
- 1 large clear glass jar: Provides the perfect transparent canvas to watch the magic unfold.
- Water: Fills the jar and acts as the atmosphere beneath the cloud.
- Shaving cream: Creates the fluffy “cloud” layer that holds the rain until it’s ready to fall.
- Food coloring (blue or any color): Adds vibrant rain drops to make your weather experiment colorful and fun.
- A dropper or spoon: Helps you gently introduce the colored water, simulating raindrops.
How to Make Rain Cloud in a Jar: Create Your Own Weather Fun! Recipe
Step 1: Fill Your Jar with Water
Start by pouring water into your clear glass jar until it’s about three-quarters full. This will serve as the sky where the rain will eventually fall. Using clear water sets the stage so the colors and cloud are easy to see.
Step 2: Add Your Cloud Layer
Next, spray a generous layer of shaving cream on top of the water. This fluffy foam mimics a cloud, hovering above your water just like in the real sky. The texture is key since it holds the colored droplets before they “rain” down.
Step 3: Prepare Your Rain
In a small cup, mix a few drops of food coloring with a little water to create your colored rain. Feel free to choose blue for classic rain or try fun colors—lavender, green, or even red—to make your cloud experiment vibrant and unique.
Step 4: Make It Rain
Using a dropper or spoon, gently release the colored water drop by drop onto the shaving cream cloud. The colored droplets will gradually saturate the foam, and once it’s full, you’ll start to see the colorful rain trickling down through the water below. It’s like watching a mini weather event right in your hands!
Step 5: Observe the Magic
Take a moment to watch how the colors slowly drift down, simulating precipitation from a cloud. It’s endlessly fascinating and a perfect conversation starter about weather and how rain forms naturally.
How to Serve Rain Cloud in a Jar: Create Your Own Weather Fun! Recipe
Garnishes
While this recipe isn’t edible, you can “garnish” your Rain Cloud in a Jar: Create Your Own Weather Fun! Recipe by adding small paper or plastic raindrops dangling from the jar’s rim, or sprinkling tiny star stickers to mimic a twinkling sky around your experiment. These little touches enhance the charm and make the experience even more immersive.
Side Dishes
Pair this activity with a fun weather-themed storybook or a colorful chart explaining rain cycles for a lovely educational combo. It’s the perfect “side dish” to feed curiosity and make the experience more enriching, especially for kids enthralled by the wonders of nature.
Creative Ways to Present
Present your Rain Cloud in a Jar: Create Your Own Weather Fun! Recipe on a tray with a small flashlight underneath to illuminate the jar from below, showcasing the rain drops more vividly. You might also try this in different jar shapes or even small bowls to observe how the rain effect changes. Turning this into a group activity where everyone creates their own colored raincloud adds a splash of creativity and shared excitement.
Make Ahead and Storage
Storing Leftovers
This experiment is best enjoyed fresh since the shaving cream and water mixture won’t hold up long. If you want to pause and come back to it later, cover the jar tightly with a lid or plastic wrap and refrigerate. However, it’s best used within 3-4 days to keep the water clear and the shaving cream fresh enough to create the cloud effect again.
Freezing
Freezing the Rain Cloud in a Jar: Create Your Own Weather Fun! Recipe is not recommended. The water and shaving cream textures will separate and ruin the visual impact, so enjoy this cloudy spectacle fresh for the best experience.
Reheating
No reheating is necessary or suggested for this recipe since it is a cold, visual experiment. Simply freshen up your ingredients and start again to recreate the fun anytime you wish!
FAQs
Can I use any kind of shaving cream for the cloud?
Yes! Most regular shaving creams work well, but look for ones that foam up nicely and hold their shape without dissolving too quickly to get the best cloud effect.
Is the colored rain safe for kids?
Absolutely. The food coloring is non-toxic, but it’s best to supervise younger children so they don’t drink the mixture. This is primarily a hands-on visual experiment.
What colors work best for the rain?
Blue is the classic choice, but feel free to get creative! Different colors make the rain effect more fun and can even be mixed to show colorful “weather” patterns.
Can I reuse the water and cloud after the experiment?
You can reuse the water, but it’s best to replace the shaving cream for a fresh cloud each time to maintain the fluffy texture and cloud effect.
Why does the colored water start to fall through the shaving cream?
The shaving cream can only hold so much liquid before it becomes saturated, and when it can’t hold any more, the colored water beads drip down through the water below, simulating rain falling from a cloud.
Final Thoughts
The Rain Cloud in a Jar: Create Your Own Weather Fun! Recipe is a charming blend of science and play that invites you to experience the wonder of nature on a miniature scale. Whether you’re doing it with kids or just indulging your inner weather enthusiast, this experiment is sure to spark joy, curiosity, and hours of colorful fascination. Give it a try and watch your own little storm come to life!
“`
Print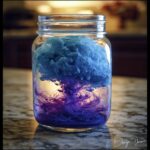
Rain Cloud in a Jar: Create Your Own Weather Fun! Recipe
- Prep Time: 5 minutes
- Cook Time: 10 minutes
- Total Time: 15 minutes
- Yield: 1 serving
- Category: Educational Activity
- Method: No-Cook
- Cuisine: N/A
Description
Create a fun and educational rain cloud in a jar using simple household ingredients to simulate weather patterns and precipitation in under 15 minutes.
Ingredients
Materials
- 1 large clear glass jar
- Water
- Shaving cream (for the cloud)
- Food coloring (blue or any color)
- A dropper or spoon
Instructions
- Fill the Jar: Pour water into the glass jar until it’s about ¾ full to create the body of the atmosphere in your experiment.
- Create the Cloud: Spray a thick layer of shaving cream on top of the water to mimic a fluffy cloud sitting above the ground.
- Mix the Rain: In a small cup, mix a few drops of food coloring with a little water to represent rain droplets.
- Drop the Rain: Use a dropper or spoon to gently place drops of the colored water onto the shaving cream “cloud.” When the cloud becomes saturated, the colored water will start to drip down, simulating rainfall.
- Observe: Watch the colorful rain drift down through the cloud and into the water below, demonstrating precipitation in a fun and visual way.
Notes
- This activity is a fun educational experiment perfect for kids to learn about weather phenomena.
- Use non-toxic and skin-safe shaving cream to ensure safety.
- You can use any food coloring color to simulate different types of rain.
- Be careful to not use too much food coloring at once to avoid oversaturating the cloud too quickly.
- Dispose of the contents responsibly after the activity.

