
There’s something so delightful about snack time when you have a batch of Healthy Homemade Fruit Roll Ups with Flavor Options Recipe ready to go. These vibrant, chewy fruit snacks bring all the natural sweetness and color of fresh fruit into a fun, portable treat that’s perfect for kids and adults alike. The best part is that they’re incredibly simple to make, customizable with your favorite fruits and flavors, and completely free from the additives and preservatives often found in store-bought snacks. Whether you’re packing lunchboxes or just craving a wholesome bite, these fruit roll ups are a delicious way to treat yourself without any guilt.
Ingredients You’ll Need
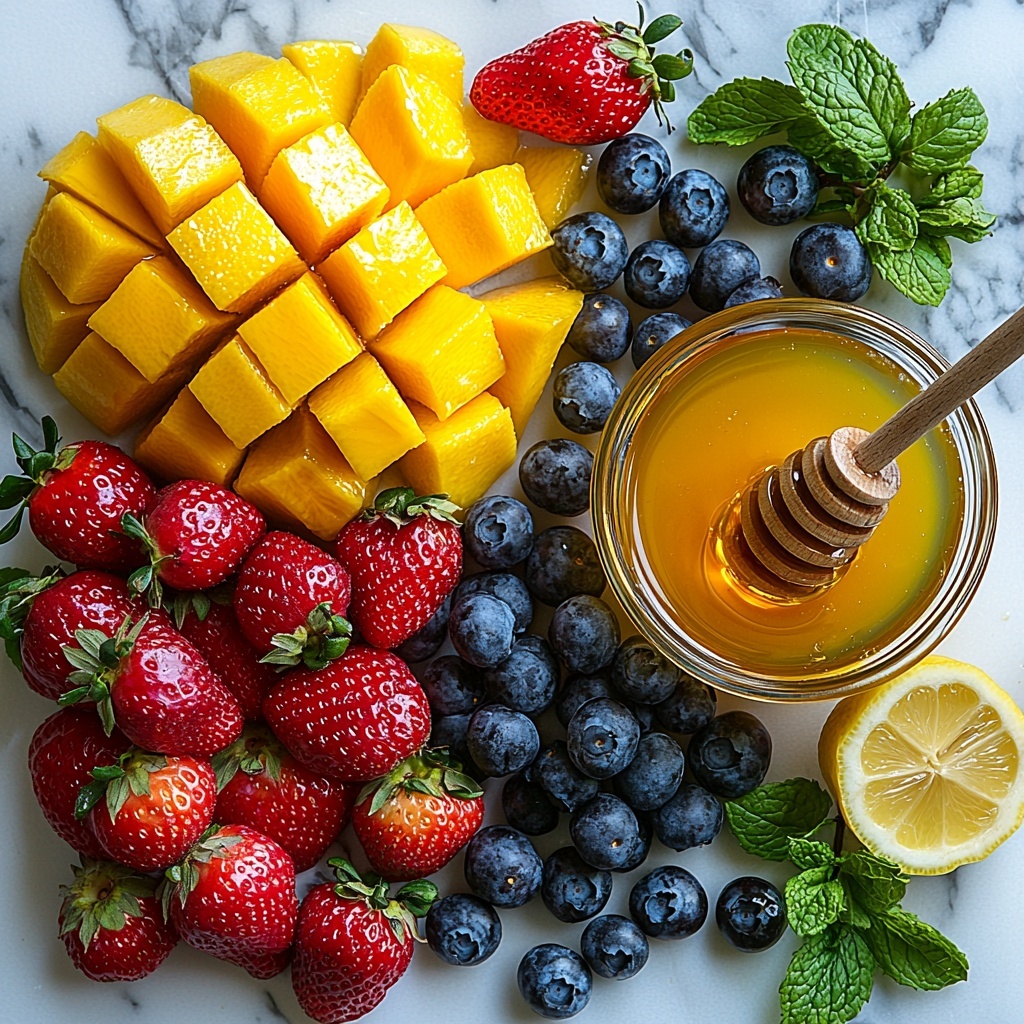
Gathering your ingredients for this recipe is refreshingly straightforward. Each component plays a key role in flavor, texture, or preserving freshness as your fruit roll ups dry and come together.
- Fruit (2-3 cups): The star of the show, choose ripe and flavorful fruits like strawberries, mangoes, or peaches for vibrant taste and color.
- Honey (2-3 tablespoons): Adds natural sweetness, but you can substitute with sugar or any sugar substitute to suit your preference.
- Lemon juice (2 tablespoons): Provides a gentle tartness to balance sweetness and helps preserve the bright color of your fruit blend.
How to Make Healthy Homemade Fruit Roll Ups with Flavor Options Recipe
Step 1: Blend Your Ingredients
Start by tossing your chosen fruit, honey, and lemon juice into a food processor or blender. Blend everything until you achieve a perfectly smooth puree. Taste it to see if you want to add a little more sweetness or lemon brightness—this step allows you to customize the flavor exactly to your liking before drying begins.
Step 2: Spread Evenly
Next, line a baking pan with parchment paper and pour your luscious fruit puree onto it. Spread it out carefully to between one-eighth and one-quarter inch thick, ensuring a consistent layer. This thickness is crucial because it affects how quickly and evenly the roll ups will dry.
Step 3: Dehydrate with Patience
Set your oven as low as it goes, ideally between 140 and 170°F, and place your pan inside. Dehydrating takes time—plan on 4 to 6 hours. During this period, the fruit layer transforms from a wet puree into a flexible, tack-free sheet. To know they’re done, gently touch the center: it should not be sticky. If necessary, keep drying until the fruit is fully set and ready to peel.
Step 4: Cool and Cut
Once your fruit leather has completely cooled, grab a pair of clean scissors and trim the edges for a tidy look. Then slice the sheet into 1-inch wide strips. Roll each strip into delightful fruit roll ups that are easy to snack on or pack for later enjoyment.
How to Serve Healthy Homemade Fruit Roll Ups with Flavor Options Recipe
Garnishes
While these roll ups shine on their own, you can add a little extra flair by sprinkling some fine shredded coconut or crushed freeze-dried fruit on top after the spreading step and before drying. It adds a light texture contrast and a hint of extra flavor.
Side Dishes
Pair your roll ups with a creamy yogurt dip or a small handful of nuts for a balanced snack that hits sweet and savory notes. They are also a perfect addition to a fresh fruit platter or a lunchbox alongside a sandwich and crunchy veggie sticks.
Creative Ways to Present
For kids’ parties or picnic treats, take your presentation up a notch by using themed cookie cutters after drying and cooling. You can also roll them up with a thin layer of nut butter inside for a delightful surprise. Placing them in colorful reusable snack bags makes packing and sharing even more fun!
Make Ahead and Storage
Storing Leftovers
Keep your homemade fruit roll ups fresh by storing them in an airtight container at room temperature. They will stay deliciously chewy for up to two weeks, making them a convenient option for busy days or last-minute snacks.
Freezing
If you want to make a larger batch, you can freeze the roll ups by placing them in a sealed freezer bag. When properly frozen, they last up to three months without losing flavor or texture. Thaw them at room temperature before enjoying.
Reheating
There’s no need to reheat fruit roll ups; they’re best enjoyed at room temperature or chilled from the fridge. If they feel too stiff after refrigeration, simply let them sit for a few minutes to regain their natural chewiness.
FAQs
Can I use any fruit for this recipe?
Yes! Most fruits work wonderfully, but those with lower water content dry faster. Berries, mango, or peaches are fantastic choices. You can also mix fruits for creative flavor combinations.
What if my fruit roll ups stick to the parchment paper?
This usually means they need more drying time. Make sure the fruit puree layer is thin and dry until it’s no longer tacky in the center before removing it.
Is honey necessary in the recipe?
Honey adds natural sweetness and helps with texture, but you can replace it with sugar or a sugar substitute depending on your dietary needs or flavor preferences.
Can I make these fruit roll ups without an oven?
If you have a food dehydrator, it works perfectly and is actually designed for this purpose. Without either, you can try very low heat settings on your oven, but drying times may vary.
How long will homemade fruit roll ups last?
Stored properly in airtight containers at room temperature, they last about two weeks. For longer storage, freezing is the best option.
Final Thoughts
Making your own Healthy Homemade Fruit Roll Ups with Flavor Options Recipe is a joy that rewards you with a delicious, wholesome snack full of vibrant flavor and natural sweetness. Through small tweaks and fun flavor options, this recipe invites you to get creative while nourishing your body. Give it a try—you might just find your new favorite treat to share with friends and family!
Print
Healthy Homemade Fruit Roll Ups with Flavor Options Recipe
- Prep Time: 15 minutes
- Cook Time: 4 to 6 hours
- Total Time: 4 hours 15 minutes to 6 hours 15 minutes
- Yield: 8 rolls
- Category: Snack
- Method: Baking
- Cuisine: American
- Diet: Gluten Free
Description
These Healthy Homemade Fruit Roll Ups are a nutritious and delicious snack made from blended fresh fruit, honey, and lemon juice, dehydrated to a perfect chewy texture. They are easy to customize with your favorite fruits and sweeteners, and a great alternative to store-bought sugary snacks.
Ingredients
Fruit Roll Ups Ingredients
- 2–3 cups fresh fruit (300 to 350 g), such as strawberries, mangoes, or peaches
- 2–3 tablespoons honey (can substitute with sugar or sugar substitute)
- 2 tablespoons lemon juice (30 mL)
Instructions
- Blend: Blend together all ingredients in a food processor or blender until the mixture is completely smooth. Taste the blend and adjust the sweetness as desired by adding more honey or sweetener.
- Spread: Line a baking pan with parchment paper. Pour the blended fruit mixture into the pan and spread it out evenly to a thickness of about 1/8 to 1/4 inch.
- Dehydrate: Place the pan in an oven set at the lowest temperature possible, ideally between 140 to 170°F (60 to 75°C). Dehydrate the fruit for 4 to 6 hours, checking occasionally. The fruit leather is ready when the middle is no longer tacky and can be peeled off the parchment without sticking, ensuring it is fully set.
- Cool: Allow the fruit roll up to cool completely. Use clean scissors to trim off the edges and cut the roll into 1-inch wide strips. Roll each strip up tightly and enjoy your healthy homemade fruit roll ups!
Notes
- Thickness affects drying time: thinner spreads dry faster.
- Use ripe, sweet fruit for the best flavor and texture.
- Store rolls in an airtight container in a cool, dry place.
- Experiment with different fruits and sweeteners based on preference.
- If your oven cannot reach low temperatures, consider using a food dehydrator.


