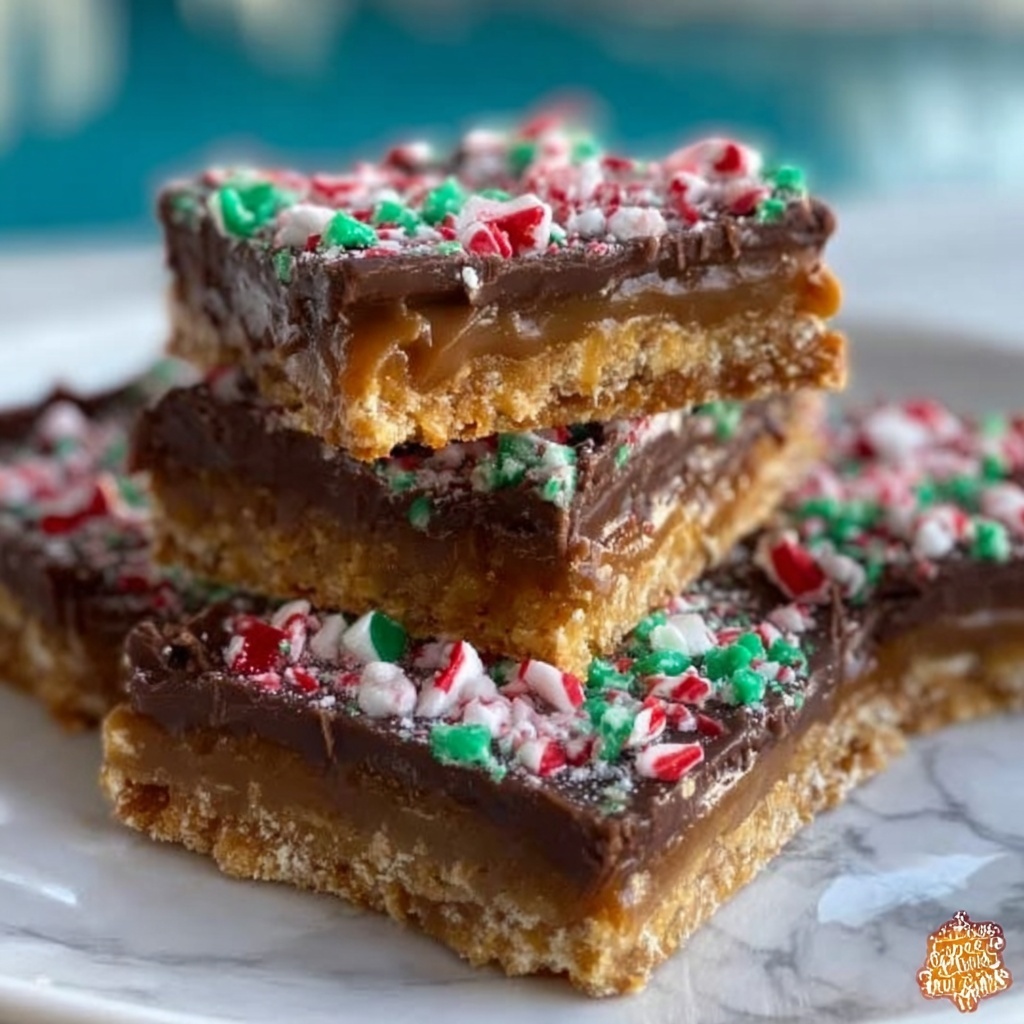
If you’re looking for a delightfully crunchy and irresistibly sweet treat, the Saltine Cracker Candy Recipe is your new best friend in the kitchen. Imagine salty, flaky saltines cloaked in rich, buttery caramel and topped with a velvety layer of chocolate—this combination delivers a perfect harmony of flavors and textures that’s simply addictive. Whether you want a quick dessert or a fantastic gift, this candy is easy to make and sure to impress everyone who tries it.
Ingredients You’ll Need
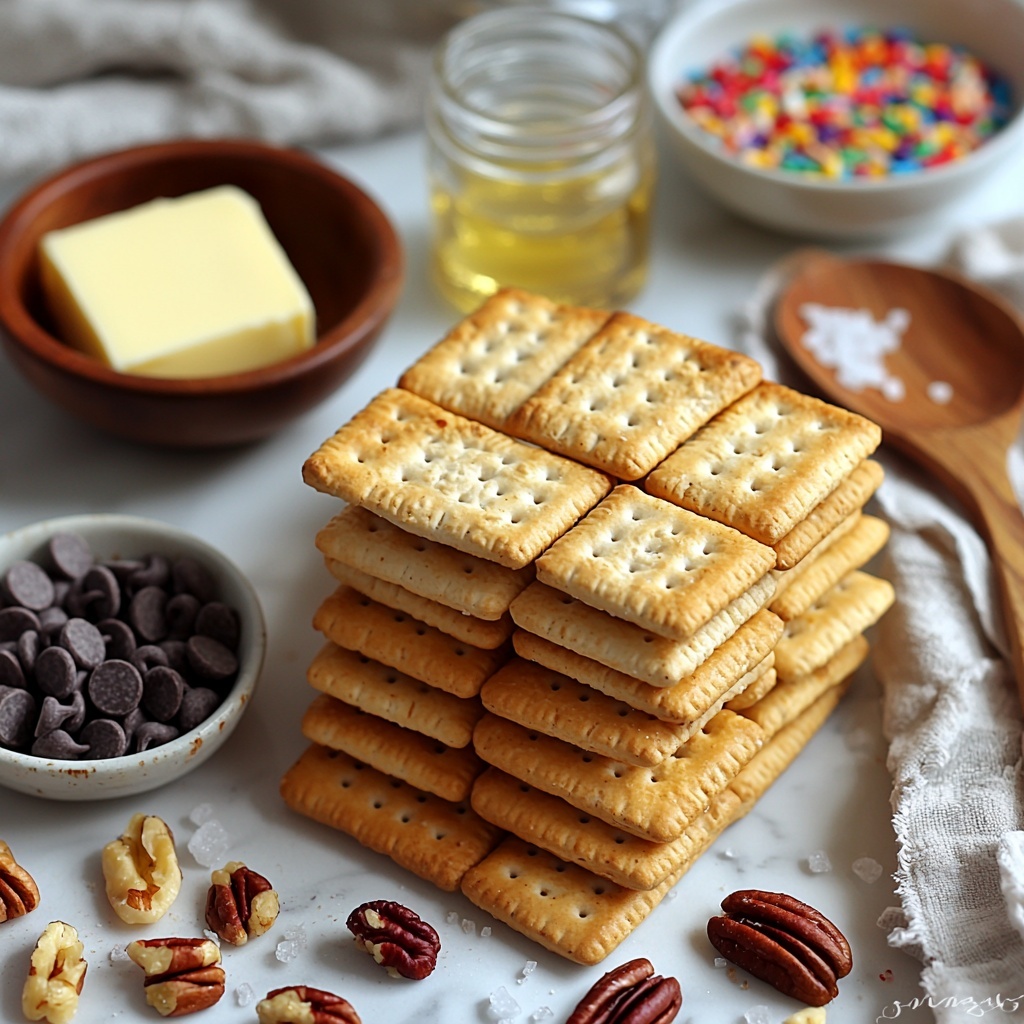
Gathering a few simple ingredients is all it takes to whip up this irresistible candy. Each element plays a vital role: the saltines provide crunch and saltiness, the buttery caramel adds warmth and sweetness, and the chocolate chips bring smooth richness that ties everything together beautifully.
- Saltine crackers: The star base offering a satisfying crunch and a touch of saltiness that balances the sweet toppings.
- Unsalted butter: Gives the caramel a creamy, rich texture without overpowering the sweetness.
- Light brown sugar: Packed and ready to create that classic deep, caramel flavor with a hint of molasses.
- Semisweet chocolate chips: Melts perfectly on top for a luscious finish that’s not too sweet.
- Vanilla extract: Adds a subtle warmth and depth, enhancing every bite.
- Flaky sea salt: Sprinkled on top to lift the flavors with a delicate crunch and salty contrast.
- Chopped pecans or walnuts (optional): Offers a nutty crunch if you want to add extra texture and flavor.
- Sprinkles (optional): Inject a little festive fun and colorful flair for special occasions.
How to Make Saltine Cracker Candy Recipe
Step 1: Prepare the Baking Sheet and Saltines
Start by lining a rimmed baking sheet or jelly roll pan with parchment paper or heavy-duty foil, making sure to leave a generous overhang for easy candy removal later. Arrange the saltine crackers in a single layer, snugly fitting them side by side without large gaps—this forms the crunchy foundation of your candy.
Step 2: Make the Caramel
In a medium saucepan over medium heat, melt the unsalted butter. Stir in the light brown sugar, and bring the mixture to a gentle boil while stirring frequently. Keep cooking for 3 to 4 minutes until the caramel thickens slightly and turns glossy—it’s important to keep stirring so the sugar doesn’t burn.
Step 3: Add Vanilla and Spread Caramel
Once your caramel is luscious and bubbling, remove it from the heat and stir in the vanilla extract. Then, carefully pour this hot caramel over the arranged saltines, using a spatula to spread it evenly so every cracker gets coated. This step seals in the perfect sweet-salty crunch.
Step 4: Bake the Caramel-Topped Crackers
Place the pan in the preheated oven at 400°F (200°C) and bake for 5 to 7 minutes. You want the caramel to bubble all over the surface, signaling that it’s cooked through and ready for the chocolate topping.
Step 5: Add Chocolate and Toppings
Remove the hot pan from the oven and immediately sprinkle the semisweet chocolate chips over the caramel. Let them sit for 1 to 2 minutes so they soften, then spread the melted chocolate evenly with a spatula. While still soft, sprinkle flaky sea salt and, if you like, the chopped nuts and sprinkles. Press them lightly into the chocolate so they stay put once set.
Step 6: Chill and Set the Candy
Allow the pan to cool on the counter for 20 to 30 minutes, then transfer it to the refrigerator for at least 30 to 45 minutes. This cooling phase firms up the caramel and chocolate layers, making the candy easy to lift and cut.
Step 7: Serve and Enjoy
Use the parchment or foil overhang to lift the entire slab from the pan. Break or slice into squares or shards depending on your preference, and you’re ready to savor every delicious bite of this homemade treasure.
How to Serve Saltine Cracker Candy Recipe
Garnishes
For an extra touch, try sprinkling a little more flaky sea salt just before serving to enhance the contrast of sweet and savory. A light drizzle of melted white chocolate or a dusting of cocoa powder can add elegant flair for special occasions too.
Side Dishes
This candy pairs wonderfully with a cup of hot coffee or tea, as the bitterness offsets the candy’s richness beautifully. For a holiday dessert table, offer alongside fresh fruit or whipped cream to balance the indulgence.
Creative Ways to Present
Break it into varied sizes and arrange the pieces in a glass jar tied with a festive ribbon for a charming gift. Or stack squares on a pretty platter alongside a sprinkle bowl of chopped nuts and sprinkles so guests can customize their treats.
Make Ahead and Storage
Storing Leftovers
Store any leftover Saltine Cracker Candy in an airtight container at room temperature for 3 to 4 days. This keeps the texture crisp and ensures the chocolate stays set without melting.
Freezing
If you want to keep it longer, wrap portions tightly in plastic wrap and place in a freezer-safe bag or container. Frozen candy can last up to 1 month. Thaw it in the refrigerator overnight before serving to maintain texture and flavor.
Reheating
There’s no need to reheat this candy since it’s best enjoyed cool or at room temperature. If the pieces soften too much, just pop them in the fridge briefly to firm up again before enjoying.
FAQs
Can I use a different type of cracker instead of saltines?
While saltine crackers are ideal for their perfect balance of saltiness and texture, you can experiment with other thin, crispy crackers. Just keep in mind that the flavor and crunch may vary.
What type of chocolate works best for the topping?
Semisweet chocolate chips provide a lovely balance between sweet and rich, but you can also use milk chocolate or even dark chocolate chips based on your taste preference.
Is it necessary to use flaky sea salt?
The flaky sea salt adds a wonderful texture and finishing touch that enhances the overall flavor. You can skip it if you prefer less saltiness, but it’s a highly recommended component.
Can I make this candy nut-free?
Absolutely! The nuts are optional and can be omitted to keep the candy nut-free, making it great for those with allergies.
How do I cut the candy without it crumbling?
Make sure the candy is thoroughly chilled in the refrigerator before cutting. Using a sharp knife and pressing down firmly will help you achieve clean squares or shards.
Final Thoughts
Making the Saltine Cracker Candy Recipe is such a joyful and rewarding experience—you get to enjoy a sweet and salty treat with minimal fuss and maximum flavor. Once you try this, it’s hard not to keep going back for more, whether for yourself or to share with friends and family. Give it a go, and you’ll soon understand why this recipe has become a beloved classic!
Print
Saltine Cracker Candy Recipe
- Prep Time: 15 minutes
- Cook Time: 15 minutes
- Total Time: 1 hour
- Yield: 24 servings
- Category: Dessert
- Method: Baking
- Cuisine: American
Description
Saltine Cracker Candy is a delightful sweet and salty treat featuring a crunchy layer of saltine crackers topped with a buttery caramel sauce and a smooth chocolate layer. Finished with a sprinkle of flaky sea salt and optional nuts and sprinkles, this candy is perfect for parties or an indulgent snack and is easy to make with basic ingredients.
Ingredients
Base Layer
- 1 sleeve saltine crackers (about 35–40 crackers)
Caramel Topping
- 1 cup unsalted butter
- 1 cup packed light brown sugar
- 1 teaspoon vanilla extract
Chocolate Topping
- 2 cups semisweet chocolate chips
- 1/2 teaspoon flaky sea salt (plus more to taste)
Optional Toppings
- 1/2 cup chopped pecans or walnuts
- 2 tablespoons sprinkles
Instructions
- Prepare the Pan: Line a rimmed baking sheet (jelly roll pan) with parchment paper or heavy-duty foil, leaving a slight overhang on the sides to facilitate easy removal of the candy later.
- Arrange Crackers: Place the saltine crackers in a single layer over the lined pan. Make sure to place them snugly together to avoid large gaps. Preheat your oven to 400°F (200°C).
- Melt Butter and Brown Sugar: In a medium saucepan over medium heat, melt the unsalted butter. Stir in the packed light brown sugar and bring the mixture to a gentle boil, stirring frequently to combine.
- Boil Caramel Mixture: Once bubbling, continue to cook for 3–4 minutes while stirring often, until the mixture thickens slightly and becomes smooth and glossy. Remove from heat and stir in the vanilla extract.
- Coat Crackers: Carefully pour the hot caramel mixture evenly over the arranged saltine crackers. Use a spatula to spread it so every cracker is well-coated.
- Bake Caramel and Crackers: Place the pan in the preheated oven and bake for 5–7 minutes, or until the caramel is bubbling across the surface.
- Add Chocolate Chips: Remove the pan from the oven and immediately sprinkle the semisweet chocolate chips evenly over the hot caramel. Let them sit for 1–2 minutes to soften.
- Spread Melted Chocolate: Gently spread the softened chocolate chips into a smooth, even layer using a spatula.
- Add Final Toppings: While the chocolate is still soft, sprinkle flaky sea salt to taste. If using, add chopped pecans or walnuts and sprinkles, pressing them lightly into the chocolate to adhere.
- Chill and Set: Allow the candy to cool to room temperature for 20–30 minutes, then transfer to the refrigerator for at least 30–45 minutes to let the chocolate and caramel fully set and firm up.
- Serve: Once chilled, lift the candy slab from the pan using the parchment or foil overhang. Break or cut into squares or shards as desired. Store any leftovers in an airtight container to maintain freshness.
Notes
- Use a rimmed baking sheet with parchment or foil for easy removal.
- Keep crackers snugly packed to ensure even coverage of caramel.
- Watch the caramel closely while boiling to prevent burning.
- Optionally add nuts or sprinkles for extra texture and flavor.
- Be careful when spreading hot caramel to avoid burns.
- Chilling ensures easy cutting and cleaner squares.
- Store leftovers in an airtight container at room temperature or refrigerated.


